
In this video I will show you the process I used to make a pen with coloured pencils on my lathe!
To begin the project I glued up my pencil blanks. These pencils are hexagonal in shape which made the glue up easy. I simply lined 7 pencils up and stuck them together one at a time with a boat load of super glue.
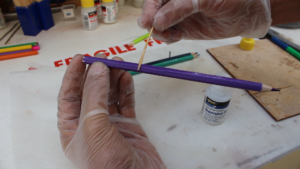
I made sure that each pencil was stuck flat side to flat side and the shape of the pencils actually made them fit together nicely.
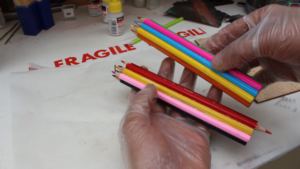
When the two sets of pencils were glued up I used my scroll saw to slice them down into smaller sections.
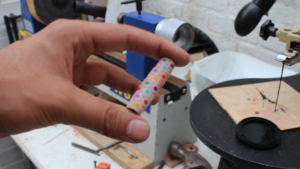
Then took the small sections and glued them together to form my pen blanks. I made sure that each blank was 10 pencils tall so they’d be large enough for the pen kit.
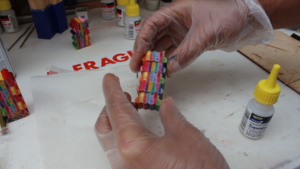
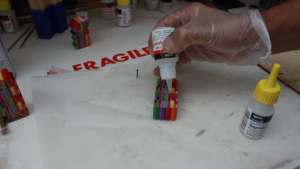
I filled any small gaps in the pencils with super glue and left them to cure.
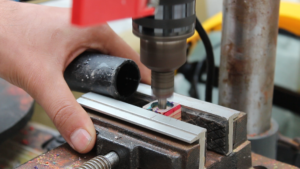
Next I prepared the blanks for drilling by trimming the edges and sanded the tops flat.
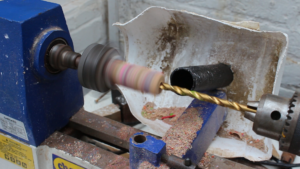
I set up the drill on my lathe to make a holes through each blank and then glued my brass tubes into the holes.
To get the tubes flush with the edges of the blank I used a barrel trimmer.
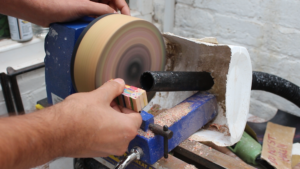
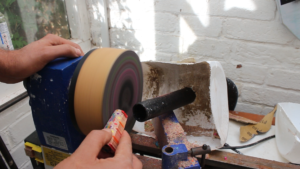
Coloured pencils are evil and tricky to work with so I decided to do the large majority of shaping on the sanding disk. This was time consuming by I got a nice rough shape without breaking any pencils.
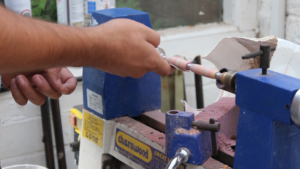
To finish the shaping I mounted the blanks on a pen mandrel and sanded them through a 120 grit. Again this took some time but I didn’t want to risk breaking my blanks with over zealous chiselling!
After shaping I sanded the pen blanks up to a 600 grit to make them smooth and cleaned the grain out with a little surgical spirit.
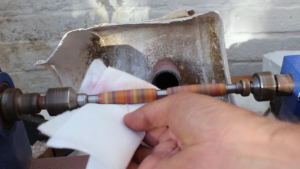
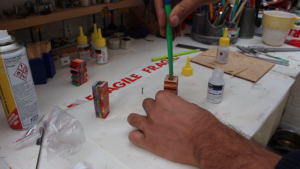
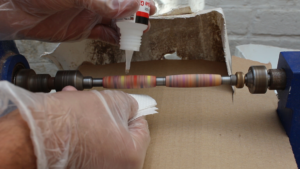
To achieve a shiny, durable finish I used super glue or CA glue finish. With the lathe running slowly, I applied a few drops of glue to each blank and rubbed them in quickly with a piece of paper towel. I applied 6 coats in total and sprayed a little bit of super glue activator in between coats to help the glue cure quicker.
Before finishing I’d lathered my bushings with beeswax to prevent the blanks getting glued to them. This worked pretty well but I ran a sharp craft knife between the bushings and blanks just in case.
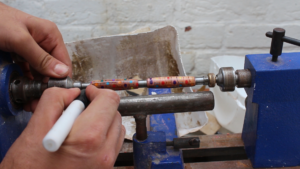
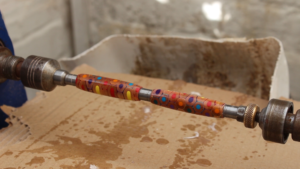
With my finish applied I polished the blanks with sand paper, working progressively through finer grits to get an even, shiny surface. The final grade was a 12,000 grit and I then used some plastic polish to bring out the shine!

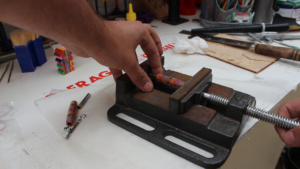
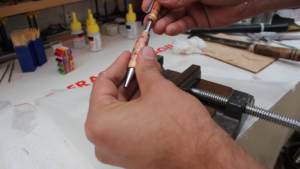
I assembled all the parts of the pen in a vice, slotted them together and then offered a prayer of gratitude to the gods of wood turning!
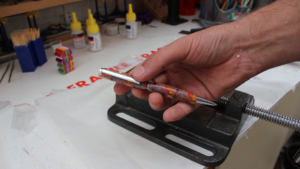
All in all this was a tricky pen turning project but the final piece looks awesome!

If you liked this video then and want to support and encourage me to make more, then become a subscriber and check out merch page!
Thank you as always for watching and see you in the next one!